
Build and deploy a static online shop with Nuxt3 using Pinia Store and Stripe Checkout to Firebase
Learn how easy it is to build an e-commerce static website with Nuxt3 while taking advantage of state management with Pinia store and accept payments through Stripe Checkout. All hosted for free on Firebase.

Nuxt3 final release is due in a few days and is already released when you're reading this. I've been looking forward to Nuxt3 for almost a year as I've been experimenting with it since the alpha release. I also tried to use Nuxt3 beta release on a couple of projects earlier this year but, unfortunately I was faced with several issues mainly related to missing plugins such as GraphQL tools and issues with static site generation.
The RC versions have started coming in the past few months, and so I decided to try out the static site generation feature on Nuxt3 by building a small shop, accept Stripe payments and deploy it on Firebase.
I found the process of building the online shop with Nuxt3 and deploying the statically generated pages to Firebase to be a breeze. I will be sharing the steps I've taken to create this website here, with you all. A useful point of reference for all new Nuxt3 static websites.
🥱 TLDR
All the code for setting up a static website with Stripe Checkout using NuxtJs is available on GitHub.
Getting started - installing Nuxt3, Pinia Store and TailwindCSS
Installing Nuxt3 is, as expected, straight forward.
The official installation docs require Node.js version 16.11 or above. If like myself you have several projects requiring different Node.js versions, you can consider using NVM (Node Version Manager) to easily switch between Node.js versions.
npx nuxi init my-shop-name

cd my-shop-name

npm install

npm run dev
The new Nuxt3 site will be available at http://localhost:3000.
Installing and configuring a Pinia Store on Nuxt3
This simple static online shop will not be fetching the products or any content from an external source, instead I have all the data in a json file, however, I still wanted to use Pinia Store for a couple of reasons. The first being I wanted to see if it is working as expected on Nuxt3 as I use it on almost on every VueJS project. Second, I think it is easier to swap the data sources from within stores' actions instead of the components directly.
Just run:
npm install @pinia/nuxt
to install the plugin and then add it as a module (with auto-import) to the Nuxt config file
nuxt.config.ts.export default defineNuxtConfig({
modules: [
[
'@pinia/nuxt',
{
autoImports: [
['defineStore', 'definePiniaStore'],
],
},
],
],
})
I then added the initial products store in
./stores/products.js.export const useProductsStore = definePiniaStore(
'products-store',
{
state : () => (
{
products: [],
}
),
getters: {},
actions: {},
}
)
Installing and configuring TailwindCSS on Nuxt3
Just heads up, I won't be designing the shop's UI in this article other than building a basic layout with minimal styling.
The easiest way to use TailwindCSS on Nuxt3 is via the Nuxt Tailwind plugin. We can install the plugin as a development dependency.
npm install --save-dev @nuxtjs/tailwindcss
And add it to the modules array in
nuxt.config.ts.export default defineNuxtConfig({
modules: [
// ...
'@nuxtjs/tailwindcss',
],
})
I also like to override the injected
tailwind.css file and the tailwind.config.js files from the get go. However, you're not required to as the plugin injects these files by default.To override the injected css file, create it at
./assets/css/tailwind.css and add the following directives:@tailwind base;
@tailwind components;
@tailwind utilities;
To override the injected config file, add the
./tailwind.config.js file and add the options you'd to override. E.g.const colors = require('tailwindcss/colors')
export default {
theme: {
extend: {
colors: {
primary: colors.blue
}
}
},
content: [],
}
Nuxt3 layouts and pages
Other than the Checkout pages, we'll have a homepage listing a couple of products and the product detail pages with a dynamic slug.
I added a default layout in
./layouts/default.vue with:<script setup>
</script>
<template>
<div class="min-h-screen">
<header>
<div class="flex w-screen bg-gray-100 h-16 px-4 text-gray-800 items-center">
<NuxtLink to="/">My Shop</NuxtLink>
</div>
</header>
<main class="p-4">
<slot></slot>
</main>
<footer class="fixed bottom-0 text-center w-full text-gray-700 p-2 text-xs z-10 bg-white py-4 border-t">
© My shop - 2022
</footer>
</div>
</template>
<style scoped>
</style>
and the homepage in
./pages/index.vue with:<script setup>
</script>
<template>
<div>
<h1 class="text-blue-400 text-2xl">Welcome to My Shop</h1>
<p class="mt-4"><strong>Please don't touch</strong>, all breakages must be paid!</p>
</div>
</template>
<style scoped>
</style>
Retrieve items from a Pinia action in Nuxt3
With the above structure ready, we can set up a couple of products, retrieve and list them on the homepage.
Since I won't be using an external CMS's API, I added two products in a JSON file at
./data/products.json.[
{
"id": 1,
"name": "Hey Sunglasses!",
"price": 10.99,
"image": "sunglasses.jpg",
"slug": "hey-sunglasses",
"stripePriceId": "price_xxxxxxxxxxxxxxxxxxxx1"
},
{
"id": 2,
"name": "Fruity Shoes",
"price": 99.01,
"image": "shoes.jpg",
"slug": "fruity-shoes",
"stripePriceId": "price_xxxxxxxxxxxxxxxxxxxx2"
}
]
We are using the client only integration which works on static pages. Thus, we need to add the products in Stripe. In a more realistic scenario, you would either pull the products directly form Stripe or create them on the fly using the API.
I also added both image files under
./assets/images/products so that we can dynamically include them in templates. Since I'm retrieving the images from the local assets, I needed to add a composable to be able to retrieve the assets. I created a ./composables/useAssets.js file with the following:export default function useAssets(asset) {
const assets = import.meta.glob('/assets/*/*/*', {eager: true});
const getAssetUrl = () => {
if (assets[asset]) {
return assets[asset].default
}
}
return getAssetUrl()
}
Finally, I added an action in the Products store to retrieve the products from the JSON file.
import products from './../data/products.json'

    actions: {
      async retrieveProducts() {
        this.products = products
      }
    }
List items from a Pinia store in a Nuxt3 page
As a next step, I want to list the products on the homepage so that the page looks similar to this:
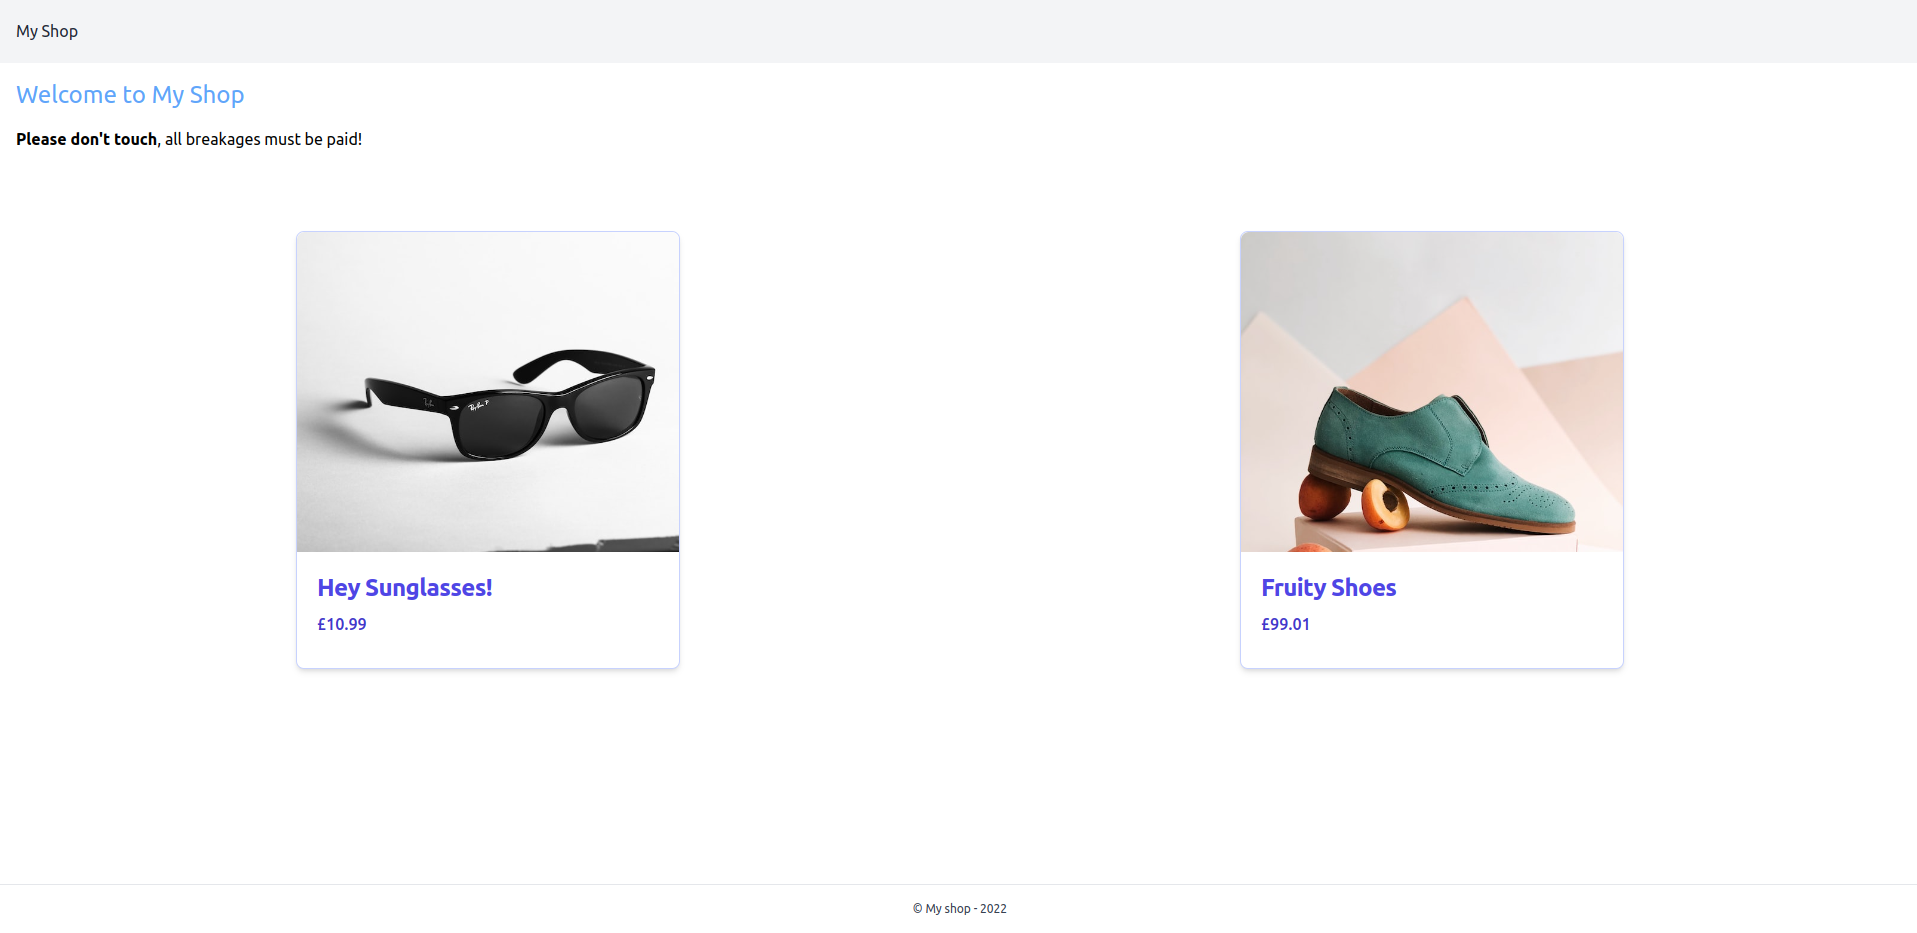
I first created a component to preview each product in
./components/Products/Preview.vue with the following content:<script setup>
const props = defineProps({
product: {
type: Object,
required: true
}
})
const image = useAssets(`/assets/images/products/${props.product.image}`)
</script>
<template>
<div>
<div class="max-w-sm bg-white rounded-lg border border-indigo-200 shadow-md dark:bg-gray-800 ">
<nuxt-link :to="`products/${product.slug}`">
<div>
<img class="rounded-t-lg h-80 w-96 object-cover hover:animate-pulse"
:src="image"
:alt="`${product.name}'s image`"
>
</div>
<div class="p-5">
<div>
<h5 class="mb-2 text-2xl font-bold tracking-tight text-indigo-600 dark:text-white">
{{ product.name }}
</h5>
</div>
<p class="mb-3 font-medium text-indigo-700 dark:text-gray-400">
£{{product.price}}
</p>
</div>
</nuxt-link>
</div>
</div>
</template>
<style scoped>
</style>
And include the preview component in a for loop on the homepage.
<script setup>

  import { useProductsStore } from '../stores/products'

  const productsStore = useProductsStore()

  const products = computed(() => {
  return productsStore.products
})

</script>

<template>
  <div>
    <div>
      <h1 class="text-blue-400 text-2xl">Welcome to My Shop</h1>
      <p class="mt-4"><strong>Please don't touch</strong>, all breakages must be paid!</p>
    </div>
    <div class="flex justify-around mt-20" v-if="products">
      <div v-for="product in products" :key="product.id">
      <ProductsPreview :product="product"/>
    </div>
  </div>
</div>
</template>

<style scoped>
</style>
To avoid retrieving the products on every page, we can call the retrieve action from the default layout file
./layouts/default.vue.<script setup>
import { useProductsStore } from '../stores/products'
const productsStore = useProductsStore()
async function retrieveProducts() {
await productsStore.retrieveProducts()
}
await retrieveProducts()
</script>
Nuxt3 dynamic pages and routes
It is now time to create the product detail page so that we can view and add the products to the cart. To have the products available at
/products/:slug route, we just need to add a single Vue file in ./pages/products/[slug].vue. We're obviously assuming that each product has a unique slug.<script setup>
import { useProductsStore } from '../../stores/products'
const productsStore = useProductsStore()
const route = useRoute()
const product = computed(() => {
return productsStore.products.find(product => {
return product.slug === route.params.slug
})
})
const image = useAssets(`/assets/images/products/${product.value.image}`)
</script>
<template>
<div>
<div class="flex mt-16 p-4">
<div class="w-1/2">
<div>
<img
class="rounded-3xl border border-indigo-200 hover:animate-pulse"
:src="image"
:alt="`${product.name}'s image`"
>
</div>
</div>
<div class="w-1/2 flex flex-col items-center justify-center">
<div><h2 class="text-5xl text-indigo-700 ">{{ product.name }}</h2></div>
<div class="my-8 flex flex-col items-center justify-center">
<button
class="px-6 py-4 bg-indigo-600 hover:bg-indigo-700 text-indigo-200 rounded-lg"
>
Add to Cart @ £{{ product.price }}
</button>
</div>
</div>
</div>
</div>
</template>
<style scoped>
</style>
Now we need to have another Pinia Store to manage the cart. Create
./stores/cart.js with the addToCart().export const useCartStore = definePiniaStore(
'cart-store',
{
state: () => (
{
items: [],
}
),
getters: {},
actions: {
async addToCart(itemPayload) {
const existingItem = this.items.find(item => {
return item.productId === itemPayload.id
})
if (existingItem) {
let existingItemIndex = this.items.findIndex(
item => item.productId === existingItem.productId
)
existingItem.quantity = existingItem.quantity + 1
existingItem.subTotal = itemPayload.price * existingItem.quantity
this.items[existingItemIndex] = existingItem
} else {
this.items.push({
productId: itemPayload.id,
productName: itemPayload.name,
price: itemPayload.price,
currency: itemPayload.currency || 'gbp',
quantity: 1,
subTotal: itemPayload.price,
stripePriceId: itemPayload.stripePriceId,
})
}
},
},
}
)
Now we should trigger the Cart store action from our product detail component by adding the following snippet to the script section:
async function addToCart() {
  await cartStore.addToCart({
    id: product.value.id,
    name: product.value.name,
    price: product.value.price,
    currency: 'gbp',
    stripePriceId: product.value.stripePriceId,
  })
}
and trigger the function when the Add To Cart button is clicked.
<button class="px-6 py-4 bg-indigo-600 hover:bg-indigo-700 text-indigo-200 rounded-lg"
        v-on:click="addToCart"
>
  Add to Cart @ £{{ product.price }}
</button>
While we're at it, we can also add a link to a new Cart page so we can easily access it. Simply create an empty page at
./pages/cart.vue, create a Cart Link component at ./components/Shopping/CartLink as follows:<script setup>
import { useCartStore } from '../../stores/cart'
const cartStore = useCartStore()
const cartItems = computed(() => {
return cartStore.items
})
</script>
<template>
<nuxt-link
to="/cart"
class=""
:class="{ disabled: cartItems.length < 1 }"
>
<div class="relative">
<div
class="absolute -top-2 -right-2 bg-indigo-600 text-indigo-100 rounded-full text-xs h-5 w-5 text-center flex justify-center justify-content-center flex-col"
v-if="cartItems.length > 0"
>
{{ cartItems.length }}
</div>
<svg xmlns="http://www.w3.org/2000/svg" fill="none" viewBox="0 0 24 24" stroke-width="1.5" stroke="currentColor"
class="w-7 h-7">
<path stroke-linecap="round" stroke-linejoin="round"
d="M2.25 3h1.386c.51 0 .955.343 1.087.835l.383 1.437M7.5 14.25a3 3 0 00-3 3h15.75m-12.75-3h11.218c1.121-2.3 2.1-4.684 2.924-7.138a60.114 60.114 0 00-16.536-1.84M7.5 14.25L5.106 5.272M6 20.25a.75.75 0 11-1.5 0 .75.75 0 011.5 0zm12.75 0a.75.75 0 11-1.5 0 .75.75 0 011.5 0z"/>
</svg>
</div>
</nuxt-link>
</template>
<style scoped>
.disabled {
pointer-events: none;
}
</style>
and then include it on the layout's header:
    <header>
      <div class="flex w-screen bg-gray-100 h-16 px-4 text-gray-800 items-center justify-between">
        <NuxtLink to="/">My Shop</NuxtLink>
        <ShoppingCartLink />
      </div>
    </header>
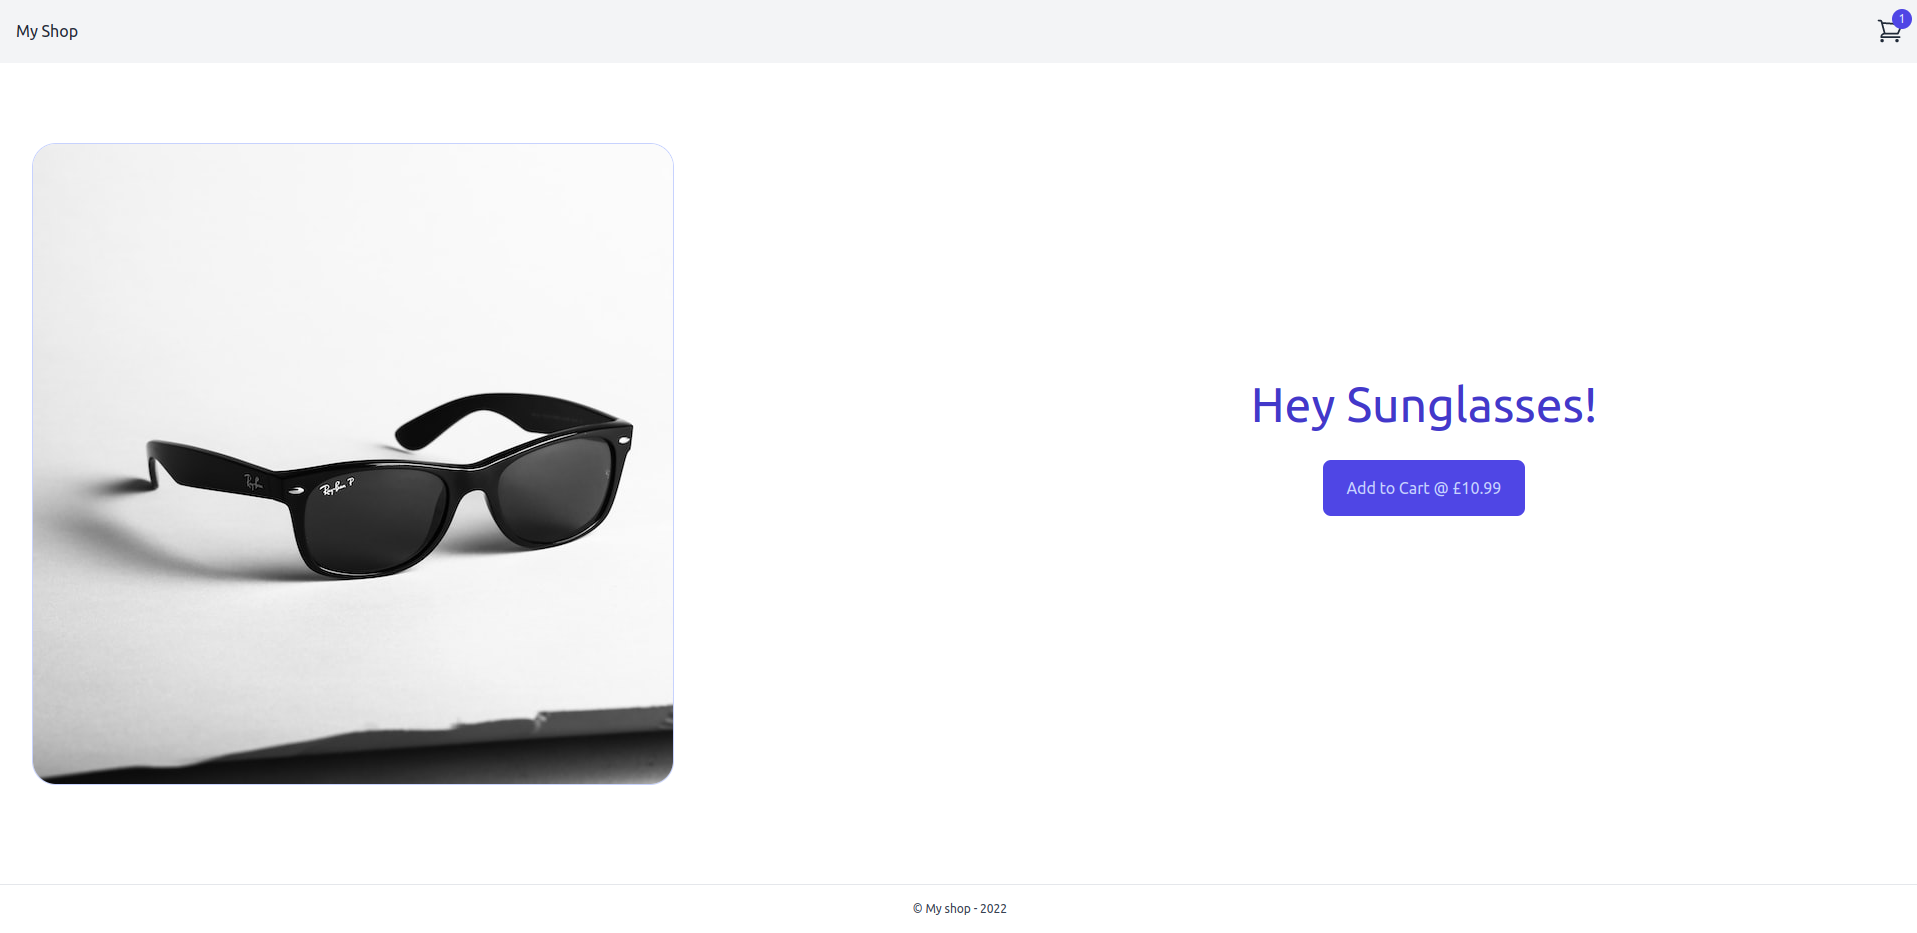
And here we have our initial product detail page with a header link to the Cart page.
Stripe Checkout on Nuxt3 static sites
Since we want a purely static site without any server routes and thus serverless functions, we first need to enable the client only integration setting on the Stripe Dashboard settings.
We also need to install the Stripe's JS library,
npm install @stripe/stripe-js -S
and add a couple of runtime config settings in
./nuxt.config.ts. runtimeConfig: {
public: {
appUrl: 'http://localhost:3000',
stripePk: 'pk_test_xxxxxxxxxxxxxxxxxxxxxx',
},
}
Now we can add a checkout action to the Cart Pinia Store.
import { useRuntimeConfig } from 'nuxt/app'
import { loadStripe } from '@stripe/stripe-js'

      async takePayment() {
        const config = useRuntimeConfig()
        const stripe = await loadStripe(config.public.stripePk)

        const lineItems = []
        this.items.forEach(cartItem => {
          lineItems.push({
            price: cartItem.stripePriceId,
            quantity: cartItem.quantity,
          })
        })

        const { error } = await stripe.redirectToCheckout({
          lineItems: lineItems,
          mode: 'payment',
          successUrl: `${config.public.appUrl}/success`,
          cancelUrl: `${config.public.appUrl}`,
        })
      }
Back to the Cart page. We will add a list of cart items and a checkout button to trigger the
takePayment() store action.<script setup>
import { useCartStore } from '../stores/cart'
const cartStore = useCartStore()
const checkingOut = ref(false)
const cartItems = computed(() => {
return cartStore.items
})
async function checkout () {
checkingOut.value = true
await cartStore.takePayment()
}
</script>
<template>
<div class="px-12 mt-12">
<div>
<div class="flex justify-between border-b p-2 font-medium bg-gray-100 items-center">
<div class="w-1/3">Product Name</div>
<div class="w-1/3 text-center">Quantity</div>
<div class="w-1/3">Sub total</div>
</div>
<div class="flex justify-between border-b p-2 font-normal" v-for="item in cartItems" :key="item.productId">
<div class="w-1/3">{{ item.productName }}</div>
<div class="w-1/3 text-center">{{ item.quantity }}</div>
<div class="w-1/3">£{{ item.subTotal.toLocaleString() }}</div>
</div>
<div v-if="cartItems.length > 0">
<div class="my-8 flex flex-col items-end justify-center">
<button
class="px-6 py-4 bg-indigo-600 hover:bg-indigo-700 disabled:bg-indigo-400 text-indigo-200 rounded-lg"
v-on:click="checkout"
:disabled="checkingOut"
>
Checkout
</button>
</div>
</div>
</div>
</div>
</template>
<style scoped>
</style>
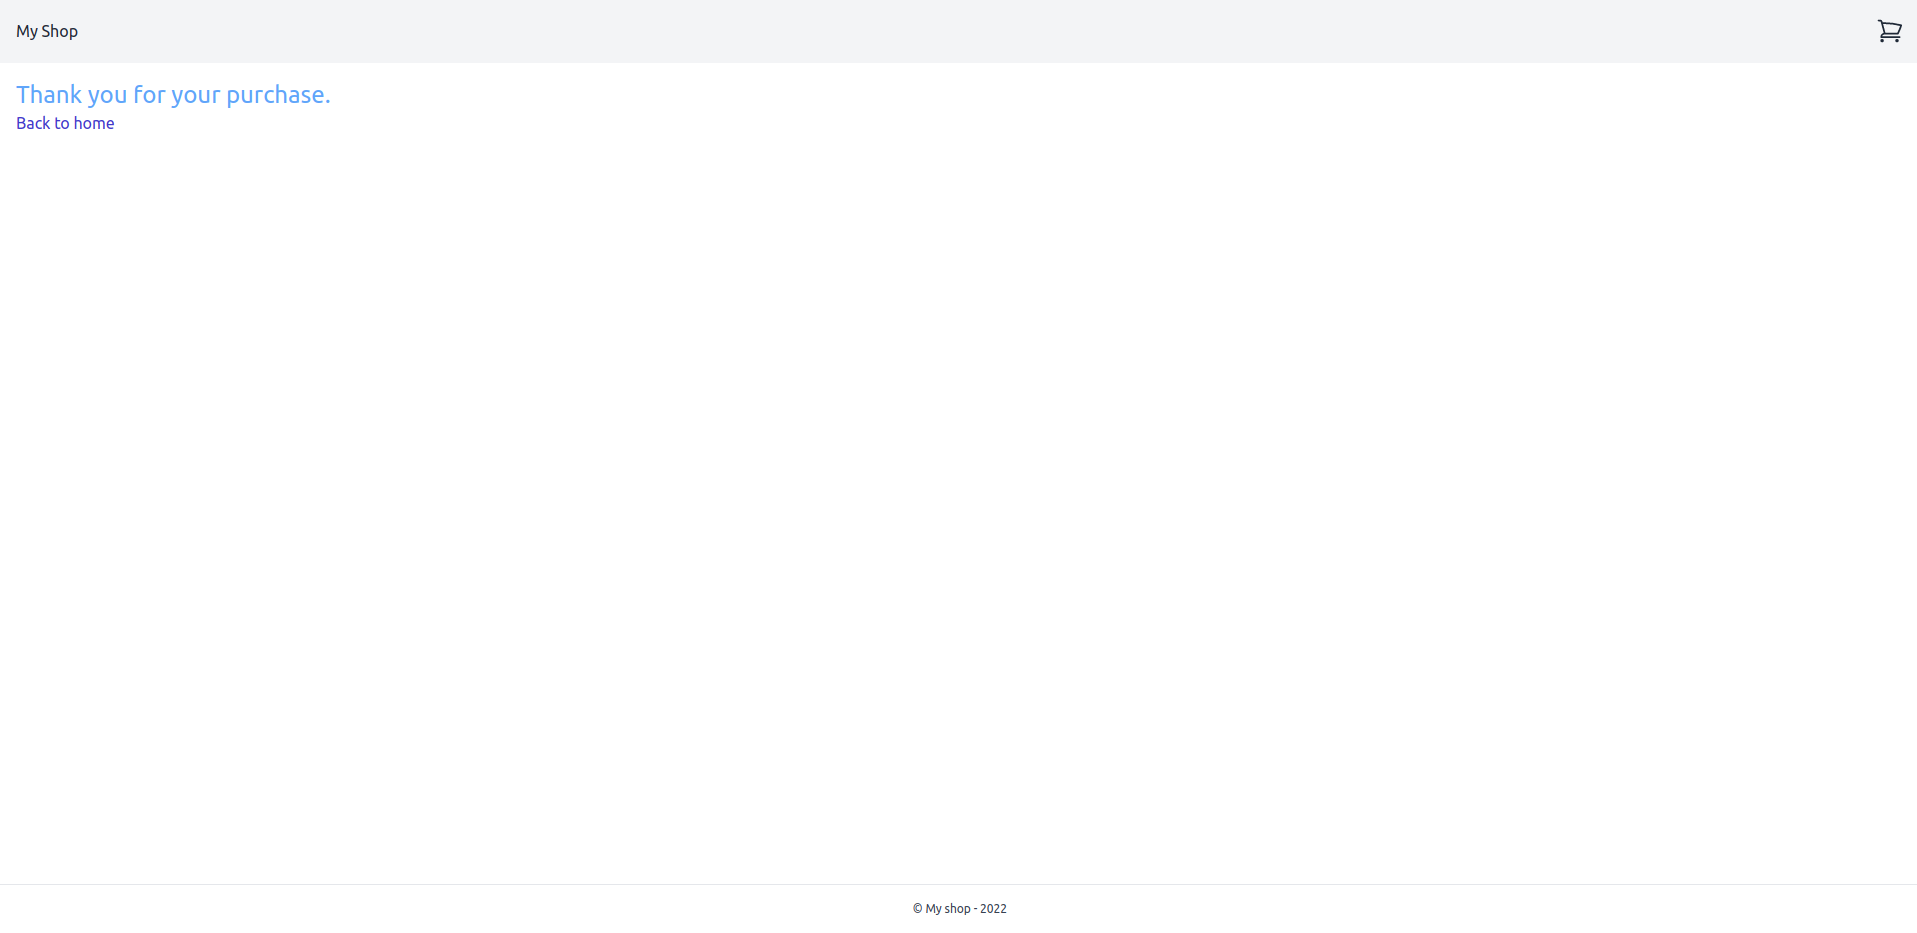
Let's also add a basic page to show the user the purchase has succeeded at
./pages/success.vue,<script setup>
</script>
<template>
<div>
<div>
<h1 class="text-blue-400 text-2xl">Thank you for your purchase.</h1>
<NuxtLink to="/" class="text-indigo-700">Back to home</NuxtLink>
</div>
</div>
</template>
<style scoped>
</style>
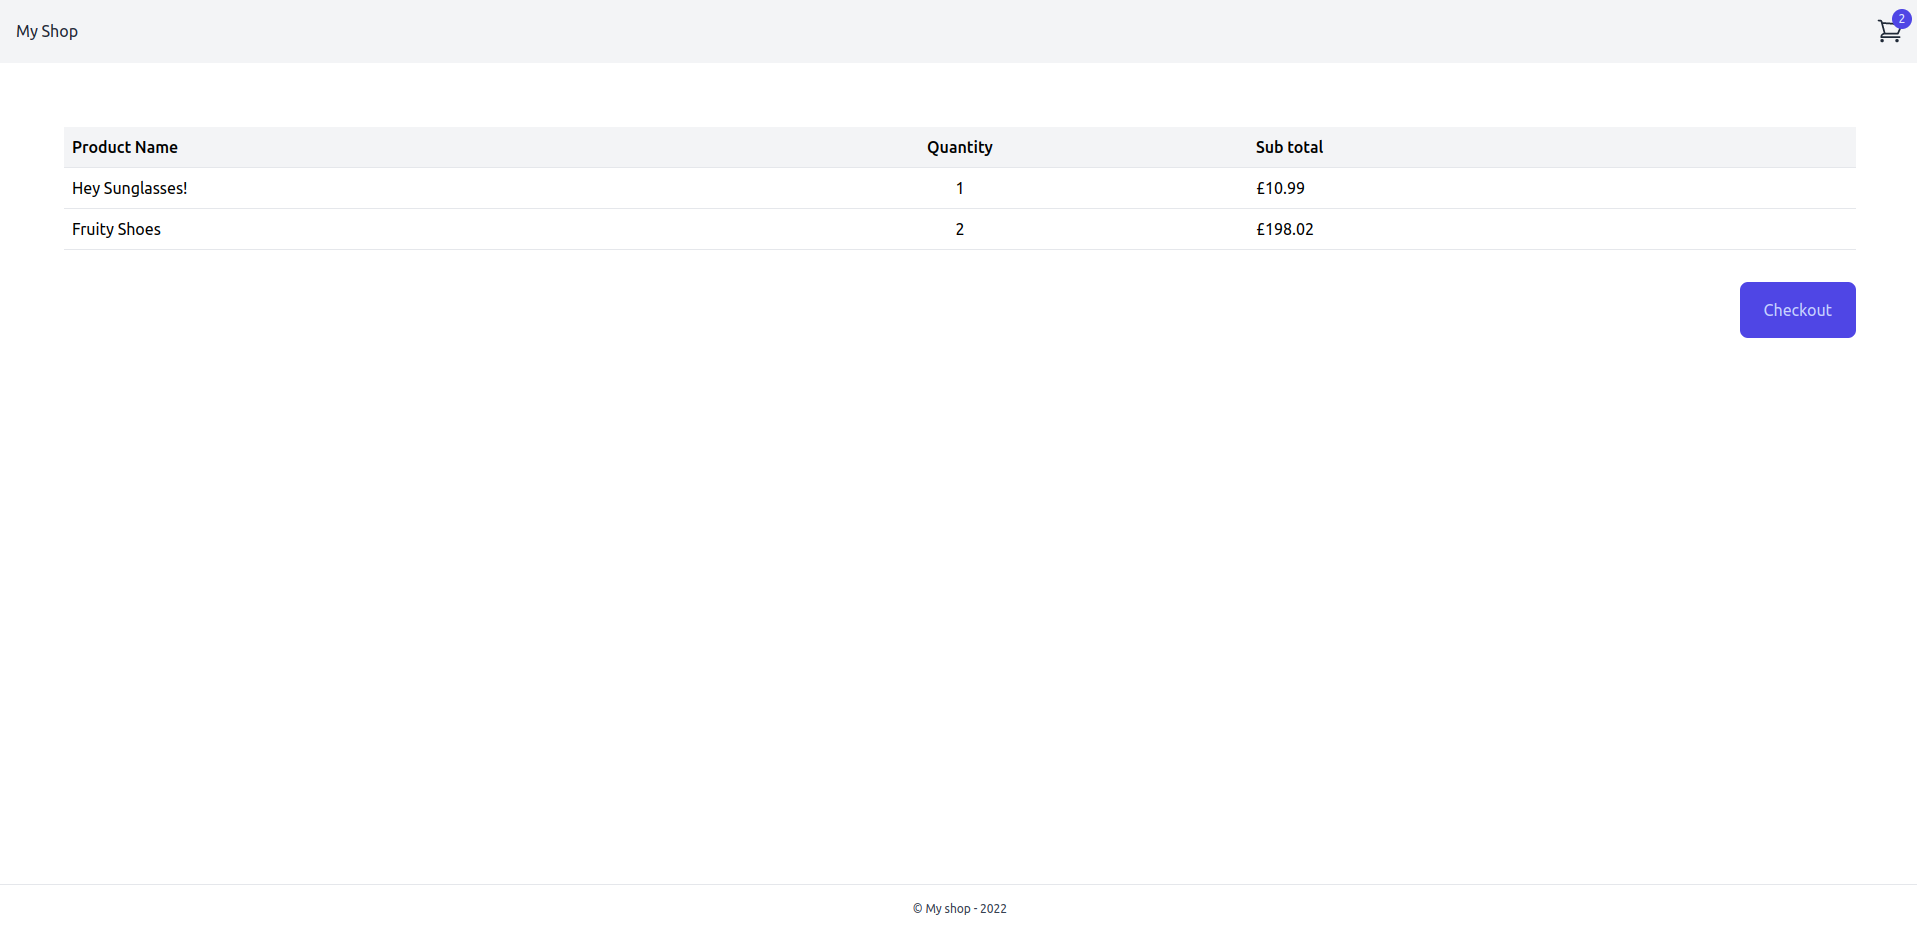
We're more or less done. The Cart page should look similar to:
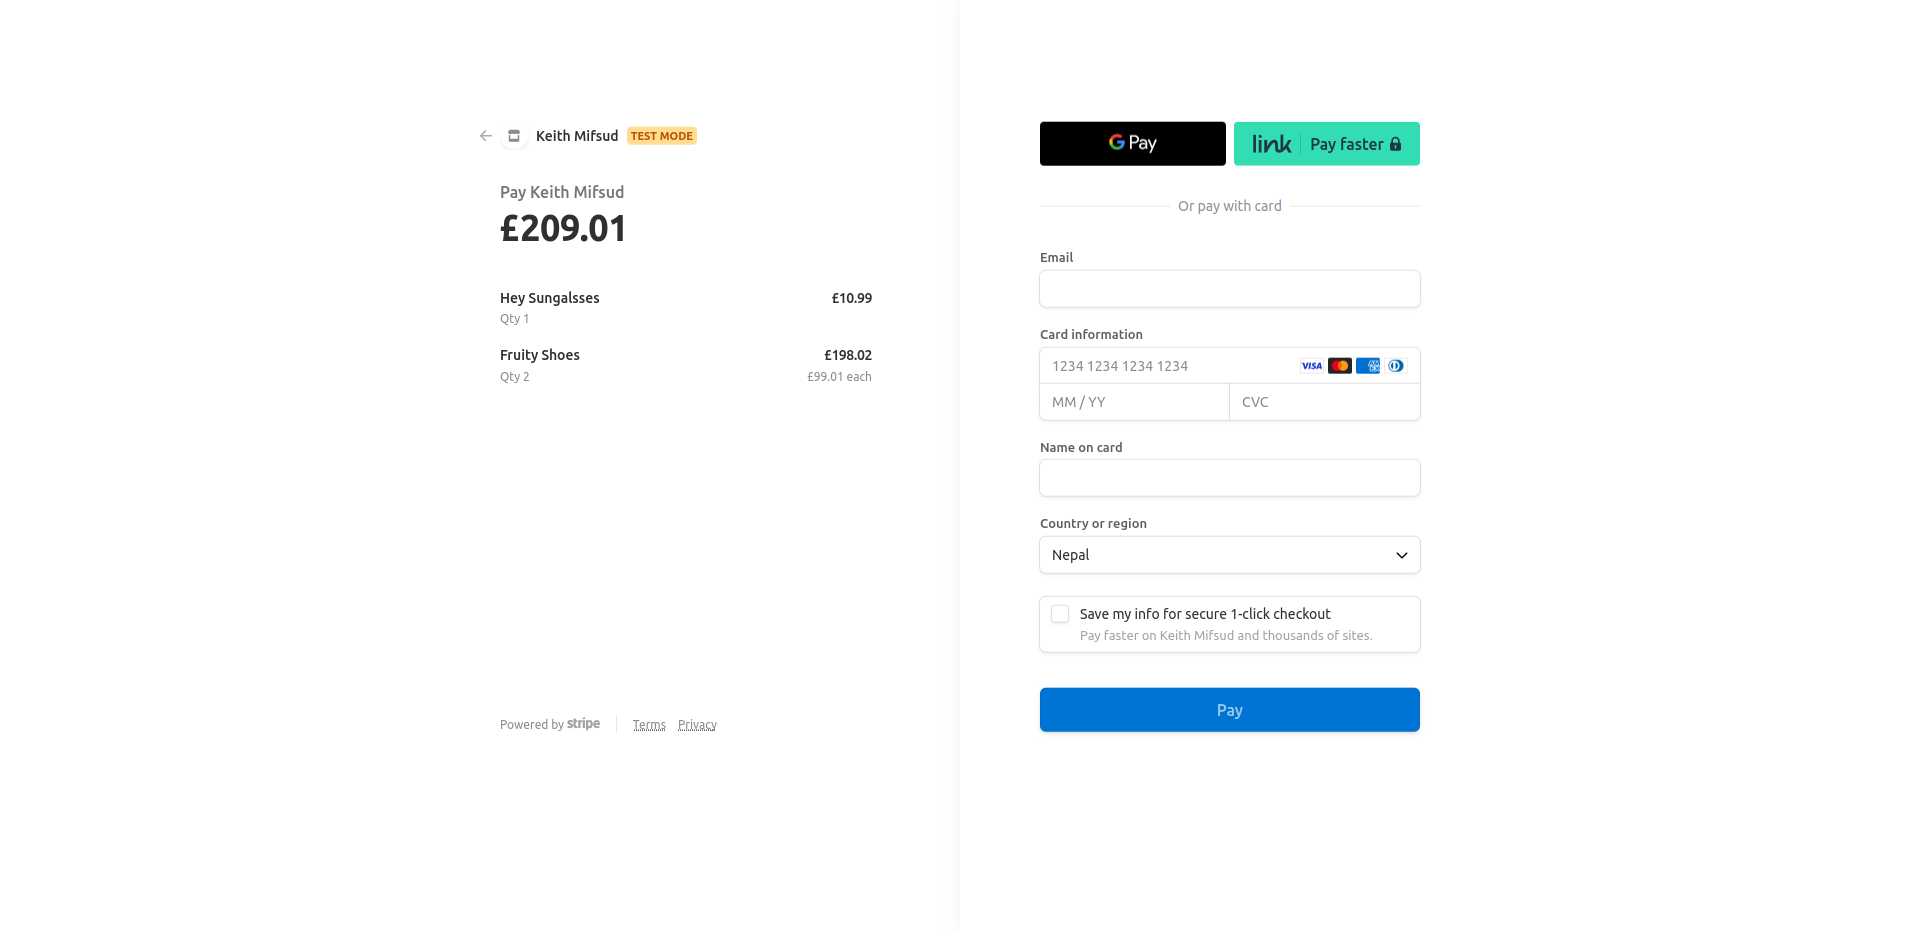
Clicking the Checkout button will render the Stripe's checkout page:
and on successful payment, Stripe will redirect to the success URL.
Dynamic page titles with Nuxt3
I also found it useful to learn how to generate dynamic page titles in Nuxt3 as they help both the user and the God of Search (Google 👻). Nuxt3 provides several ways to manage the HTML Head, and it also includes a wrapper composable
useHead() which extends on the @vueuse/head. Using the composable is a very good way to go about having dynamic page titles and other <head> elements. However, at least for the time being, I prefer to use the <Head> and <Title>. I've added the following to the Product Detail page:<template>
<Head>
<Title>{{ product.name }} - My Shop</Title>
</Head>
....
</template>
and
  <template>
  <Head>
    <Title>My Shop</Title>
  </Head>
  ....
</template>
to the default layout. I also added similar components to the Cart and Success pages.
Generate the static website on Nuxt3
Now that we've built our shop, we're ready to generate our Nuxt3 static website 🎉.
Generating the static cannot be easier. Simply run the generate command:
npm run generate
Deploy Nuxt3 static site to Firebase
Since our generated site is static, we can deploy it to several platforms with ease and in a lot of cases free of charge. I chose to try to deploy this shop to Firebase because my current website, the one you're reading from is hosted on there, and thus I wanted to see if the process of hosting this Nuxt3 static shop on Firebase will be as straightforward as it currently is to host my own website. It is.
Again, there are several ways to go about deploying the shop to Firebase, all easy and some offer more features such as using GtHub actions to generate the site on GitHub before it is deployed. I chose fewer features, generate the site locally and deploy the pages afterwards.
If you don't have the Firebase CLI already installed:
npm install -g firebase-tools
and then login:
firebase login
With the Firebase CLI available, we can just
init a new hosting deployment:firebase init hosting
and either choose to use an existing or a new project. When prompted to choose the public directory, type
.output/public as opposed to the default choice.=== Hosting Setup
Your public directory is the folder (relative to your project directory) that
will contain Hosting assets to be uploaded with firebase deploy. If you
have a build process for your assets, use your build's output directory.
? What do you want to use as your public directory? (public) .output/public
And that's it. You can now run
firebase deploy
and access your live website at the project's URL. 🥳
The end
That's it, we can now all start selling and make it rain 🤑
My conclusion is that building, generating and deploying a static website with Nuxt3 is very straightforward. To me, the only challenging part of this process was to render the images from local assets which I finally solved with the
useAssets composable.I'm even considering moving this website to NuxtJS as I'll have more control than what I currently have with GatsbyJS in terms of customisation.
I'm sure that Nuxt3 will be my go to framework for static sites onwards. Who knows, I might even write more articles about Nuxt3 to share what I learn so please subscribe here if you want me to email you when I write more articles, and why not, follow me on X too? 😉.
Feel free to ask your questions on social media 🖖